

PHP static site & blog generator with markdown support.
Using the power of laravel's Blade templating engine.
composer create-project themsaid/katana your-site-name
Check Github project || continue reading the docs ☟
Installing Katana is fairly easy, first you need to run the composer create-project command:
composer create-project themsaid/katana your-site-nameNow you have a fresh installation of Katana in the your-site-name directory, now you need to build your site
by running the following commands:
cd your-site-name
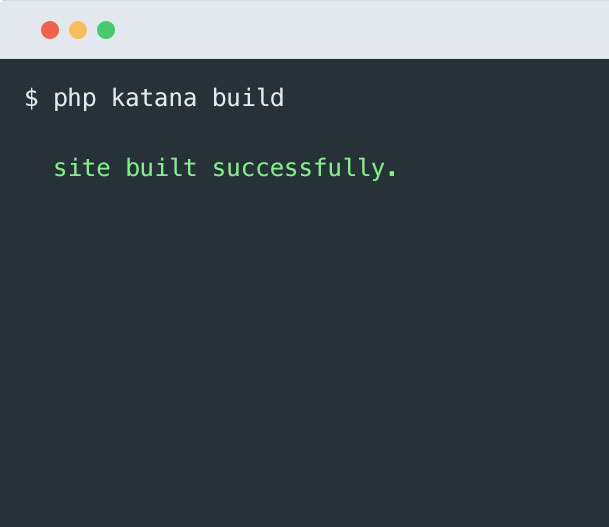
php katana buildThe website files will be generated in the public directory.
You can optionally define the environment you'd like to build the website for using the env console option:
php katana build --env=productionDoing so will make katana look for a config-production.php file, you can overwrite any default option in this file.
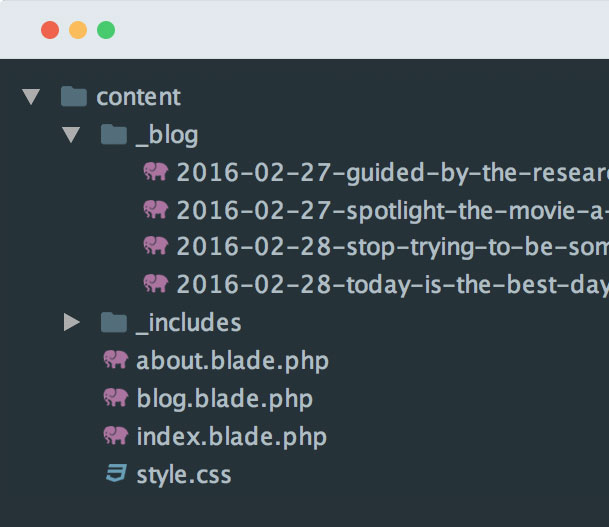
After running the build command the structure will contain the following files:
content This is where Katana looks for your site content._cache This is where Blade saves its compiled views.public Katana will generate your site static files in this directory.config.php This is where your site configurations are.This directory holds your blade views, static assets (JS files, stylsheets, images, etc...), the
_blog directory, and the
_includes directory.
The
_includes directory is where you place your layouts and base views, Katana will not generate accessible pages for these files.
The _blog directory is where you save your blog posts.
This file contains a list of predefined configuration values Katana needs to be able to generate your website, each configuration option is accompanied by a detailed explanation of what it's for.
In this file you may also define any custom variables, later you can call these variable in any blade view in your website.
If you're not already familiar with Blade then here's a description for it from laravel's website:
Blade is the simple, yet powerful templating engine provided with Laravel. Unlike other popular PHP templating engines, Blade does not restrict you from using plain PHP code in your views.
It's recommended that you read more about Blade.
Katana includes a @markdown directive for Blade, here's how you can use it:
<h2>Regular HTML heading</h2>

@markdown
    This is some **Markdown** content.
@endmarkdownKatana also includes a @url() directive to generate URLs for pages and assets based on the site's base_url configuration:
@('/')                // Outputs '/'

@('about')            // Outputs '/about'

@('assets/style.js') // Outputs '/assets/style.js'Inside each view you may call any of the variables defined in config.php, there are also some variables assigned automatically by Katana:
$currentViewPath -> holds the path from the filesystem to the current view being rendered.$currentUrlPath -> holds the current URL path.You may also use a .md file to render your website/blog pages, all you need to do is to replace the .blade.php extension with a .md extension and adjust your files like so:
---
view::extends: _includes.base
view::yields: body
---

This is a pure markdown document, but you still may use {{ $anyBladeSyntax }}.

<div class="alert alert-info">
@markdown
This will allow you to have **markdown** parsed even inside HTML blocks.
@endmarkdown
</div>
Although the file extension is .md but you may still use all blade directives.
Generating a blog with Katana is insanely easy, all you have to do is to create a new file in the
/content/_blog/ directory with the following format for the name:
2016-03-03-my-post-slug.blade.phpThe date at the beginning of the name will help make your posts sorted by date in the filesystem, it'll also be used to generate a unique pretty URL for your post, the generated URL for the above post is:
blog.com/my-post-slug-20160303A blog post view may look like this:
@section('post::title', 'Stop Trying To Be Somebody')
@section('post::date', 'February 28, 2016')

@section('post_body')
    <h2>@yield('post::title')</h2>
    <small>@yield('post::date')</small>

    Post content here.
@stop
Section names starting with post:: will be added to a global variable called $blogPosts, this variable will be present in all blade views and it contains an array of post objects.
You can use this variable to loop over all blog posts:
@foreach($blogPosts as $blogPost)
    <li>
        <a href="{{ $blogPost->path }}">
            {{ $blogPost->title }} at {{ $blogPost->date }}
        </a>
    </li>
@endforeach
The path attribute is automatically added by Katana, it holds the relative URL to the blog post.
You may have your posts in a pure markdown file as well:
---
view::extends: _includes.blog_base
view::yields: post_body
post::title: Stop Trying To Be Somebody
---
**Markdown** post content here.Katana generates pages to display every chunk of posts, you first need to set the postsPerPage and postsListView configuration values in
config.php.
Go ahead and take a look at the configuration file to know more about what every configuration does.
Inside the pagination view a $paginatedBlogPosts variable exists containing all the posts for display in
the current page, there's also $nextPage and $previousPage variables that hold links to the next and previous pages.
You can use Katana to publish a website over GitHub Pages using subtrees, the idea is to
deploy the public directory as the master branch of your user GitHub pages repository or the gh-pages branch of
your project repository.
We're going to call this branch gh-pages-source, install Katana on this branch and add content to your installation normally.
Once your content is ready to be published run the build command:
php katana buildIf you're going to publish the website on a GitHub page for a project rather than a user you'll need to define a base_url.
php katana build --base_url=project-repo-nameFirst you need to make sure the public directory is removed from .gitignore first, once it's commit-able you may run
these commands:
git add --all

git commit -m 'publishing website'

git push origin gh-pages-sourcegit subtree push --prefix public origin masterOR
git subtree push --prefix public origin gh-pagesAfter installing Katana you'll find sample content for a website and a blog included, take a look at these files in order for you to better understand how Katana compiles different types of files & blog posts.